System Info Overlay — Guide
Activating the overlay with a button remap
The system info overlay does not activate on its own, the user must assign a remote control button to it. This is done from the Mappings section.
Step 1 — Open Mappings and add a button
Go to Mappings in the main menu and tap Add Button at the bottom of the screen.
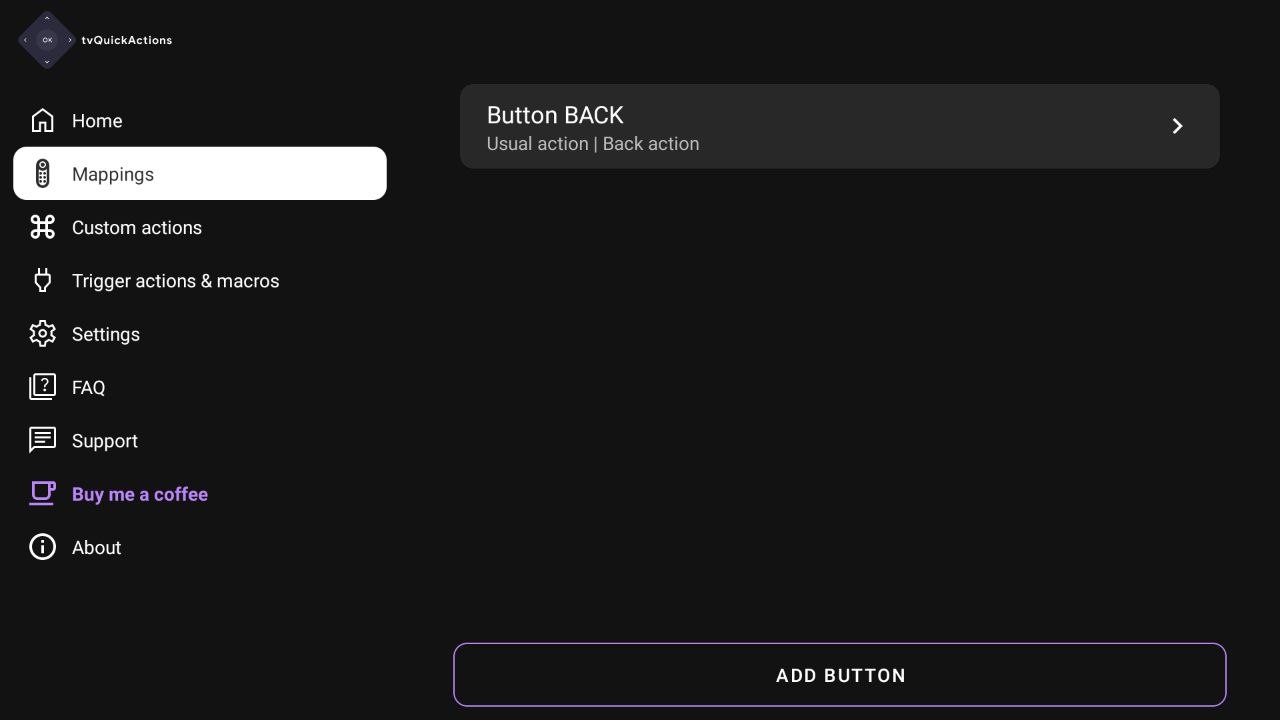
The Mappings screen lists all configured buttons. Tap "Add Button" to start a new remap.
Step 2 — Press the button you want to remap
The app will prompt you to press the physical button on your remote that you want to assign. Press it now.
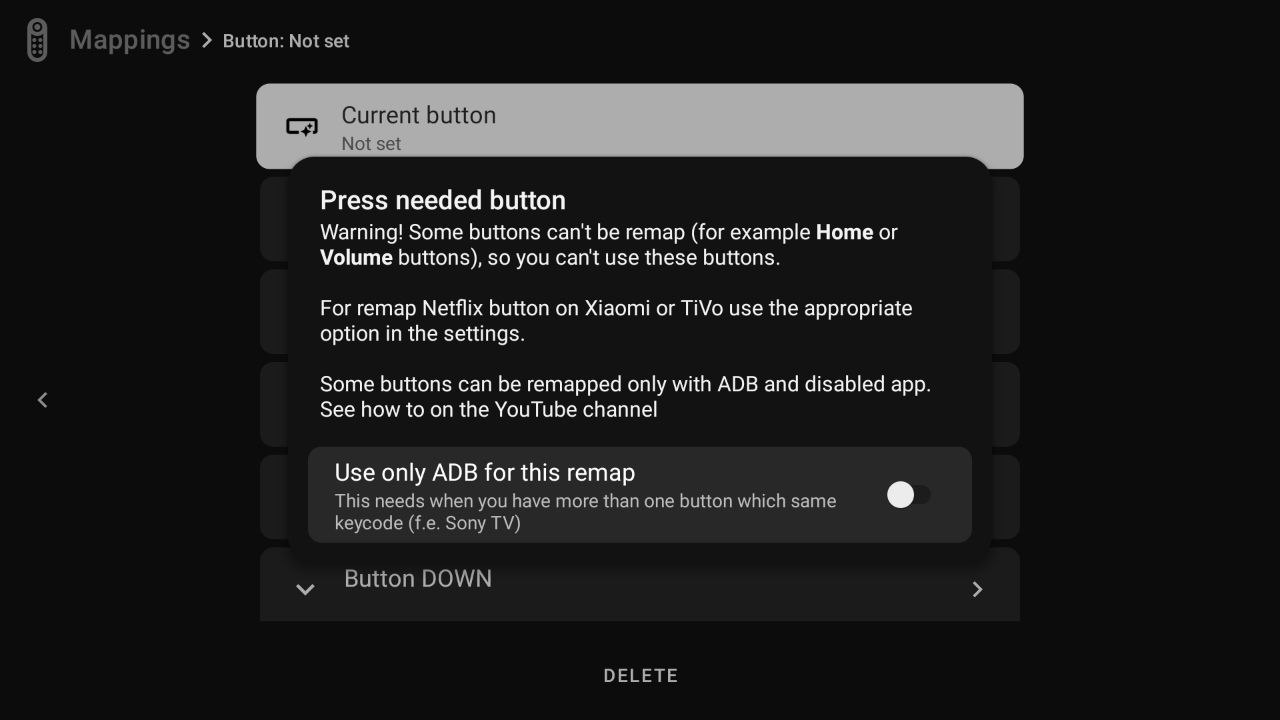
Some buttons cannot be remapped (e.g. Home or Volume). If the button you press is not recognized, try a different one.
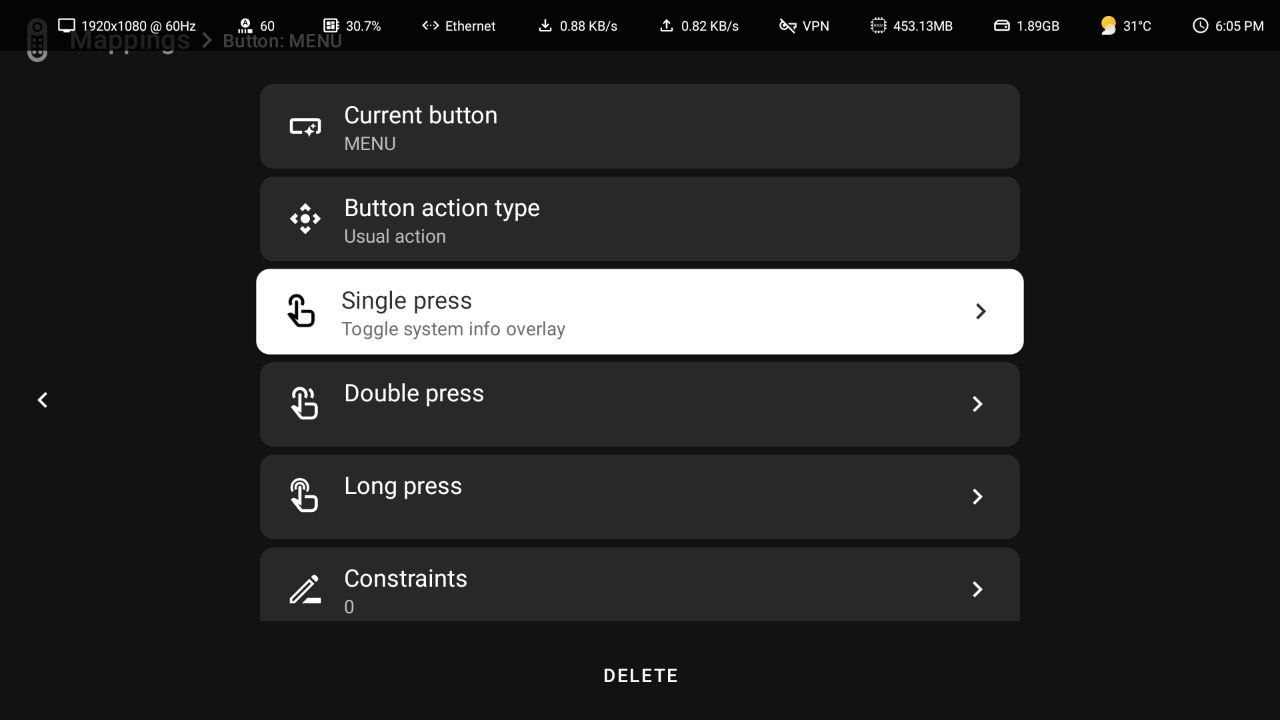
Step 3 — Configure the button action
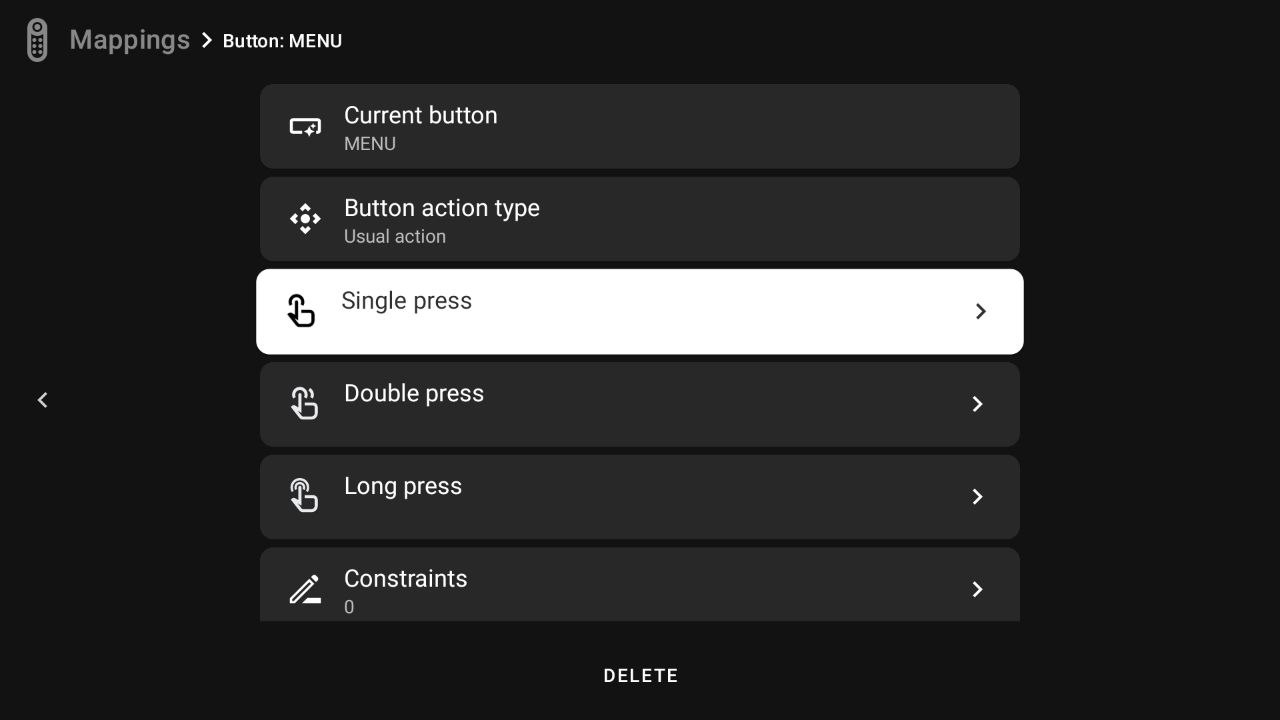
Once the button is detected, you will see its configuration screen. Under Button action type, there are two possibilities: Usual action (for direct execution) and Panel (to open a menu).
For this example, we will select Usual action to enable a direct command. Then, tap Single press (or Double press / Long press, depending on your preference)
Step 4 — Choose the overlay action
In the action picker, go to the Feature tab and select Toggle system info overlay.
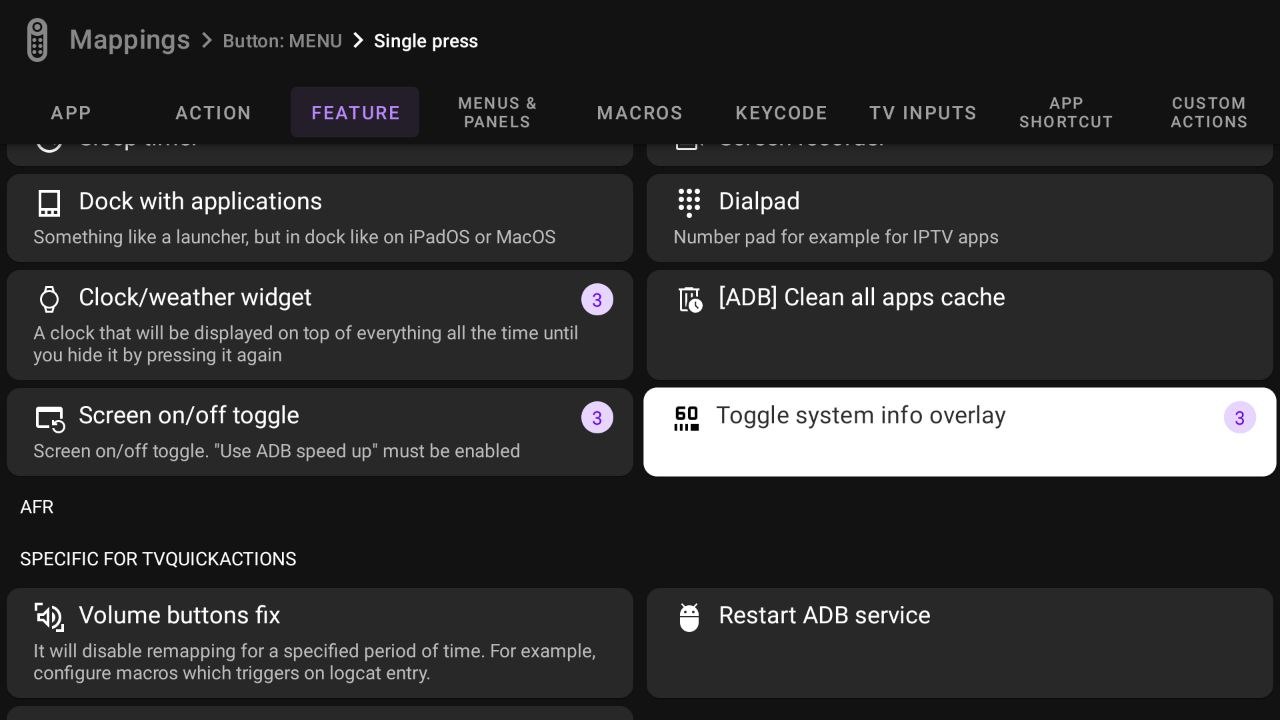
"Toggle system info overlay" shows and hides the overlay each time the button is pressed.
Step 5 — Test the overlay
After assigning the action, you will return to the configuration screen where Toggle system info overlay is now listed.
To finish, press the physical button on your remote. The overlay will immediately appear at the top of the screen, confirming that the remap was successful. From now on, use this same button to show or hide the statistics at any time.
This guide explains the System Info Overlay feature of TV Quick Actions. The overlay is a persistent heads-up display that floats above all other apps and shows live system statistics directly on screen.
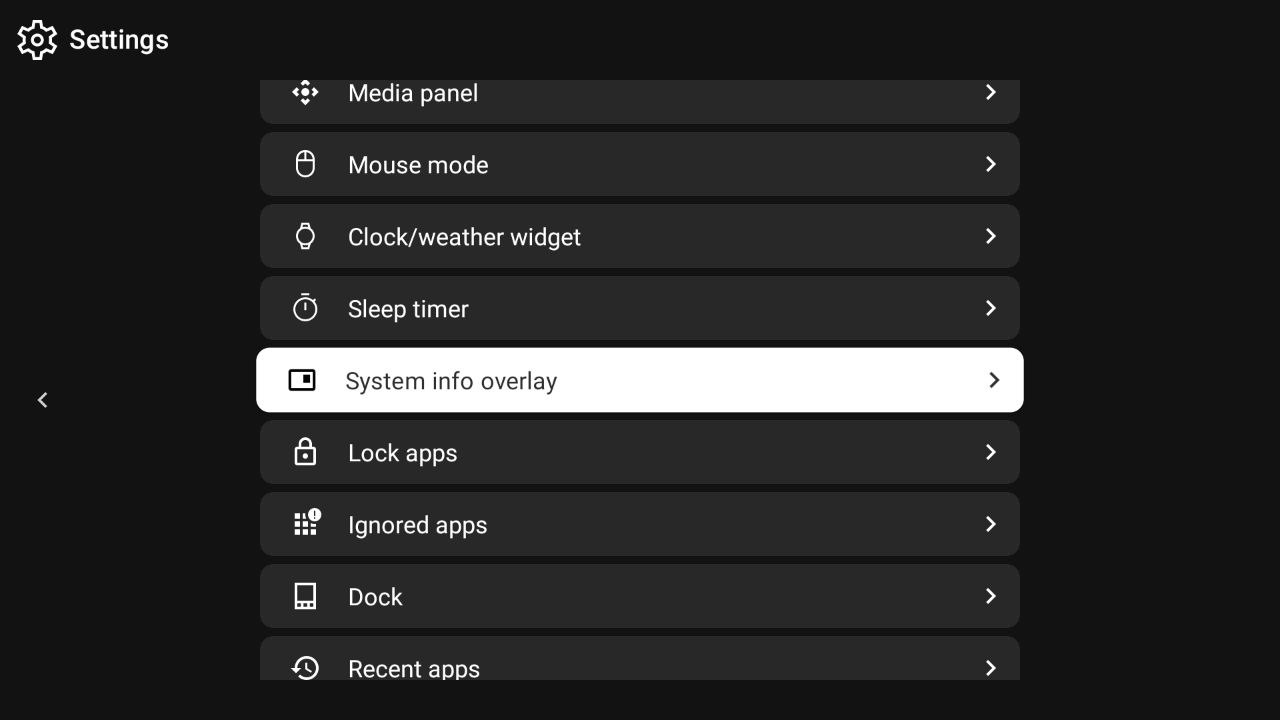
Accessing the Settings
To open the overlay settings, go to Settings → System info overlay.
Layout Mode
The first option in the overlay settings is Layout mode. It determines the visual style in which stats are rendered on screen.
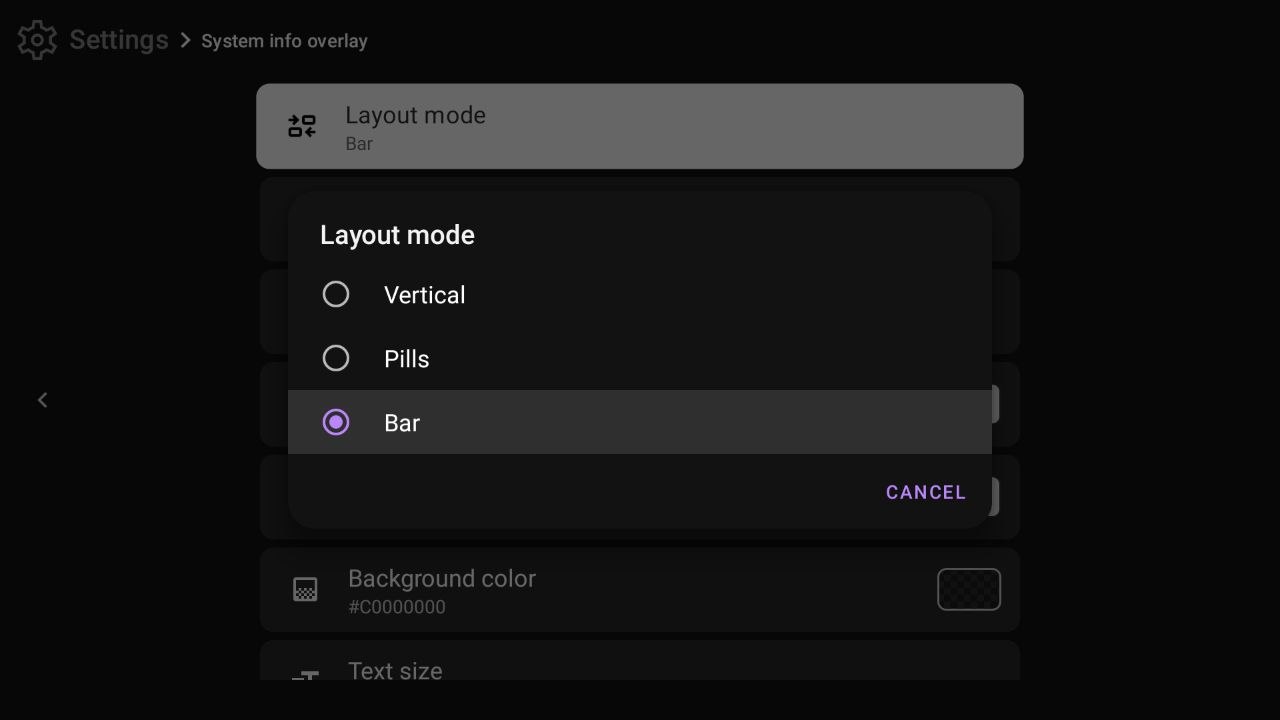
There are three layout modes:
Vertical (mode 0) — Classic two-column text layout. Stats are shown as label-value pairs stacked vertically. This is the most information-dense mode and supports section titles and separator lines.
Pills (mode 1) — Each stat is displayed as an individual floating pill with an icon and value, arranged in a horizontal flow. Supports icon color and icon size settings.
Bar (mode 2) — Similar to Pills but all pills share a single full-width background bar. Gives a clean, HUD-style appearance. Horizontal offset and corner radius settings are hidden in this mode.
The layout mode affects which style settings are visible. For example, outer padding only appears in Pills and Bar modes; corner radius is hidden in Bar mode.
Position
The overlay position controls where on screen the overlay appears.
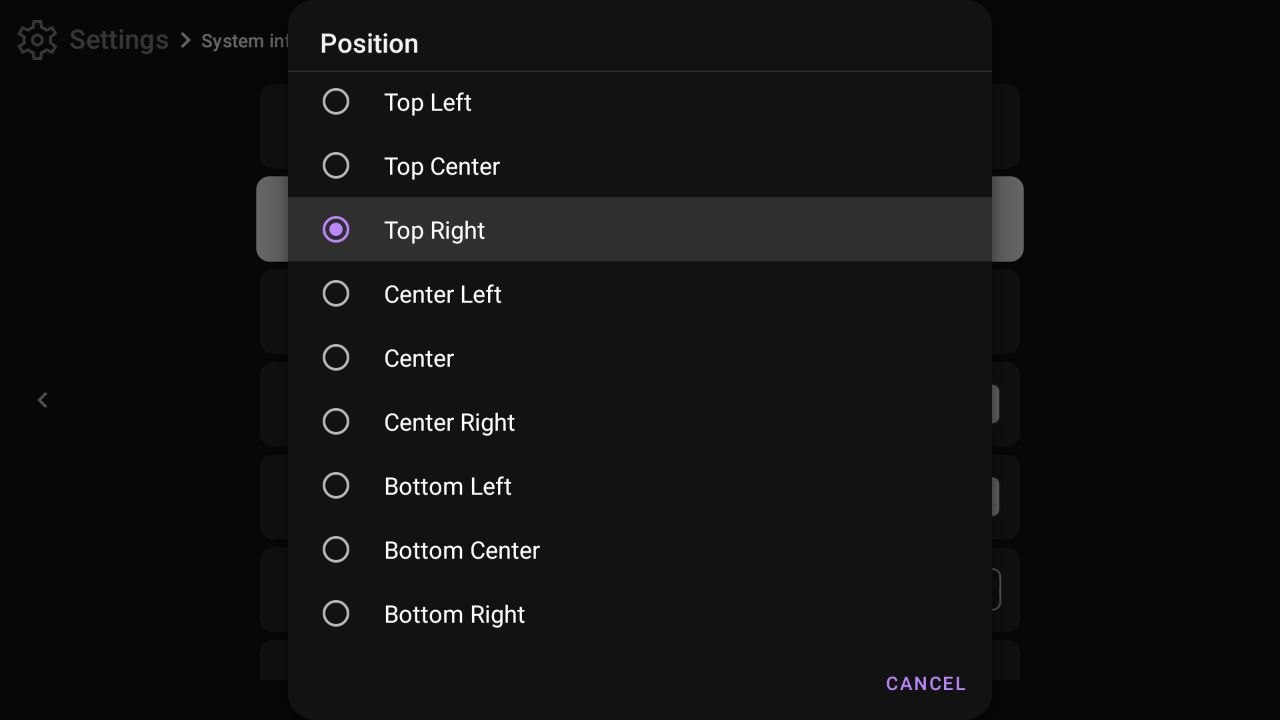
Nine positions are available in a 3×3 grid: Top Left, Top Center, Top Right, Center Left, Center, Center Right, Bottom Left, Bottom Center, and Bottom Right.
When the overlay is at the left or right edges, Horizontal offset controls the distance from that edge. When at the top or bottom, Vertical offset controls the distance. Center positions ignore the respective offset.
Displayed Stats
The Displayed Stats option lets you choose which statistics appear in the overlay and in what order.
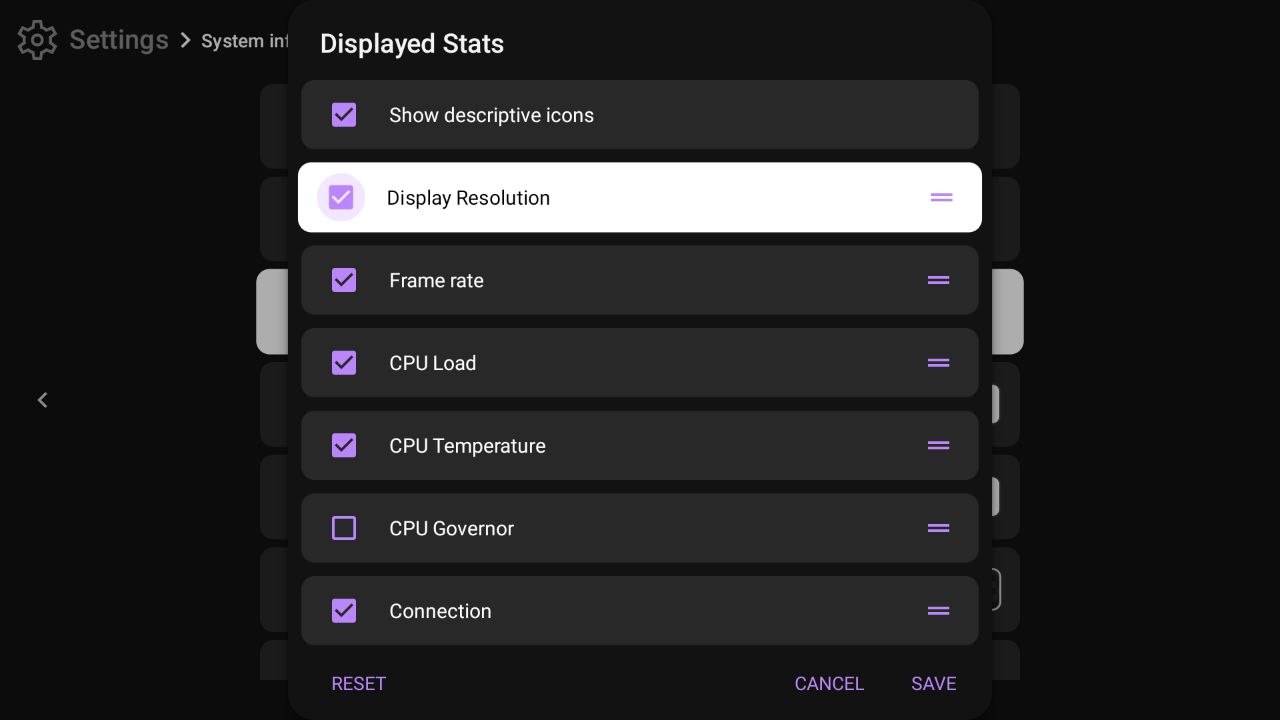
Each item has a checkbox to show or hide it, and a drag handle to reorder it. The "Show descriptive icons" checkbox at the top controls icons globally.
| Stat | Description |
|---|---|
| Display Resolution | Screen resolution, e.g. 1920x1080 |
| Frame rate | Current video frame rate (FPS) |
| CPU Load | Total CPU usage percentage |
| CPU Clock | Per-core frequency (Vertical mode only) |
| CPU Temperature | CPU temperature in °C or °F |
| CPU Governor | Current CPU scaling governor |
| Connection | Connection type: WiFi, Ethernet, Cellular |
| Download speed | Real-time network download speed |
| Upload speed | Real-time network upload speed |
| VPN | VPN active / inactive indicator |
| Memory | RAM usage (format configurable) |
| Internal storage | Internal storage usage (format configurable) |
| External storage | SD card or USB drive usage |
| App name | Name of the currently foreground app |
| App memory | RAM used by the foreground app |
| App storage | Disk used by the foreground app |
| Background processes | Active background process count |
| Time | Current time |
| Date | Current date |
| Weather | Temperature and weather icon |
| Now playing | Current media playback state and progress |
| Now playing info | Media title and artist |
In Vertical mode, additional items appear: section titles (Video, CPU, Other) and separator lines. These are hidden in Pills and Bar modes.
Tapping Save applies your changes. Tapping Reset restores the default stat order and visibility.
Colors and Sizes
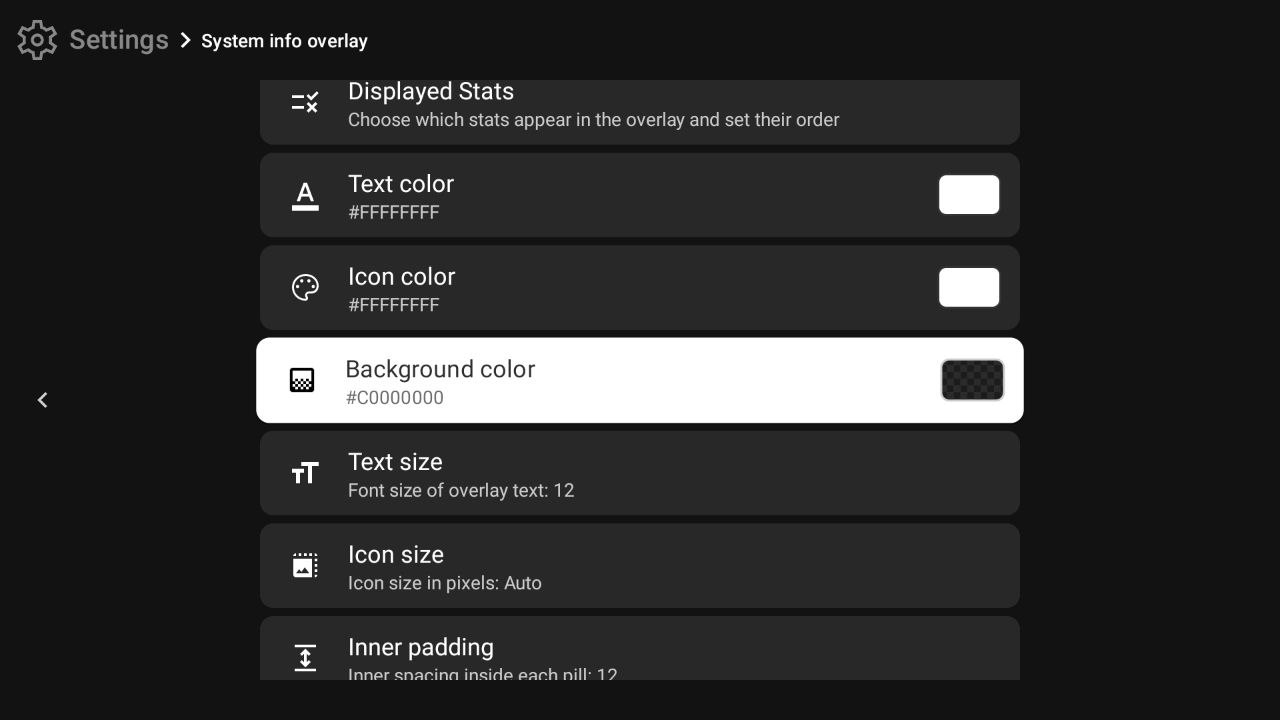
Text color
Color of all text in the overlay. Tapping opens a full ARGB color picker. Default: #FFFFFFFF (opaque white).
Icon color
Color applied to all icons (Pills and Bar modes). The alpha channel also controls icon transparency. Default: #FFFFFFFF (opaque white).
Background color
Background color of the overlay panel or pills. A fully transparent background means no visible background. Default: #C0000000 (black at ~75% opacity).
Text size
Font size for overlay text, in SP units. Adjustable via a slider. Default: 12.
Icon size
Size of icons in Pills/Bar modes, in DP units. When set to minimum (5), icons are automatically sized to match the text size. Default: Auto.
Inner padding
Spacing inside each pill between its edge and its icon/text. Applies to all layout modes. Default: 12.
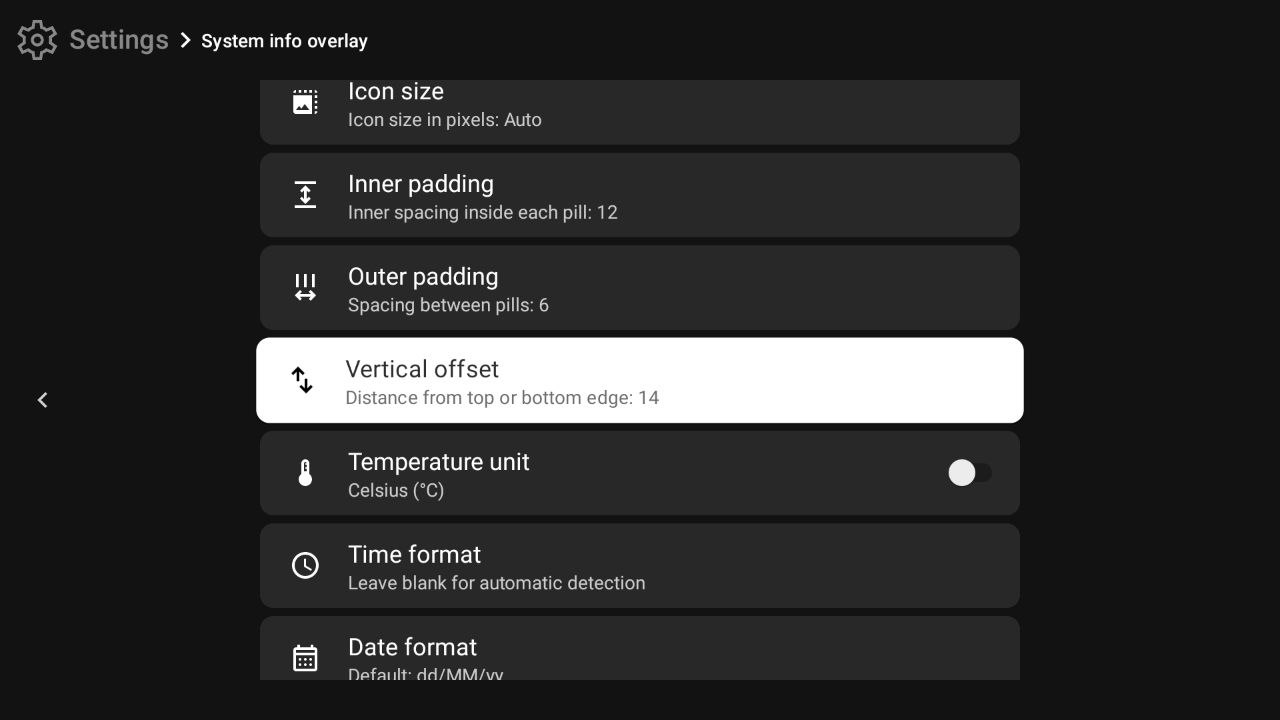
Spacing and Offsets
Outer padding
Spacing between individual pills (Pills/Bar mode only). Default: 6. Not visible in Vertical mode.
Horizontal offset
Distance from the left or right screen edge to the overlay, in DP. Only applies to left/right anchored positions. Default: 14. Not visible in Bar mode.
Vertical offset
Distance from the top or bottom screen edge to the overlay, in DP. Only applies to top/bottom anchored positions. Default: 14.
Corner radius
Rounded corner radius of the overlay panel or pills, in DP. Default: 12. Not visible in Bar mode.
Format Settings
Temperature unit
Toggle between Celsius (°C) and Fahrenheit (°F). Default: Celsius.
Time format
Custom Java SimpleDateFormat pattern, e.g. H:mm for 24-hour or h:mm a for 12-hour. Leave blank to follow the device's system setting. Default: automatic.
Date format
Custom Java SimpleDateFormat pattern. Default: dd/MM/yy.
Miscellaneous Settings
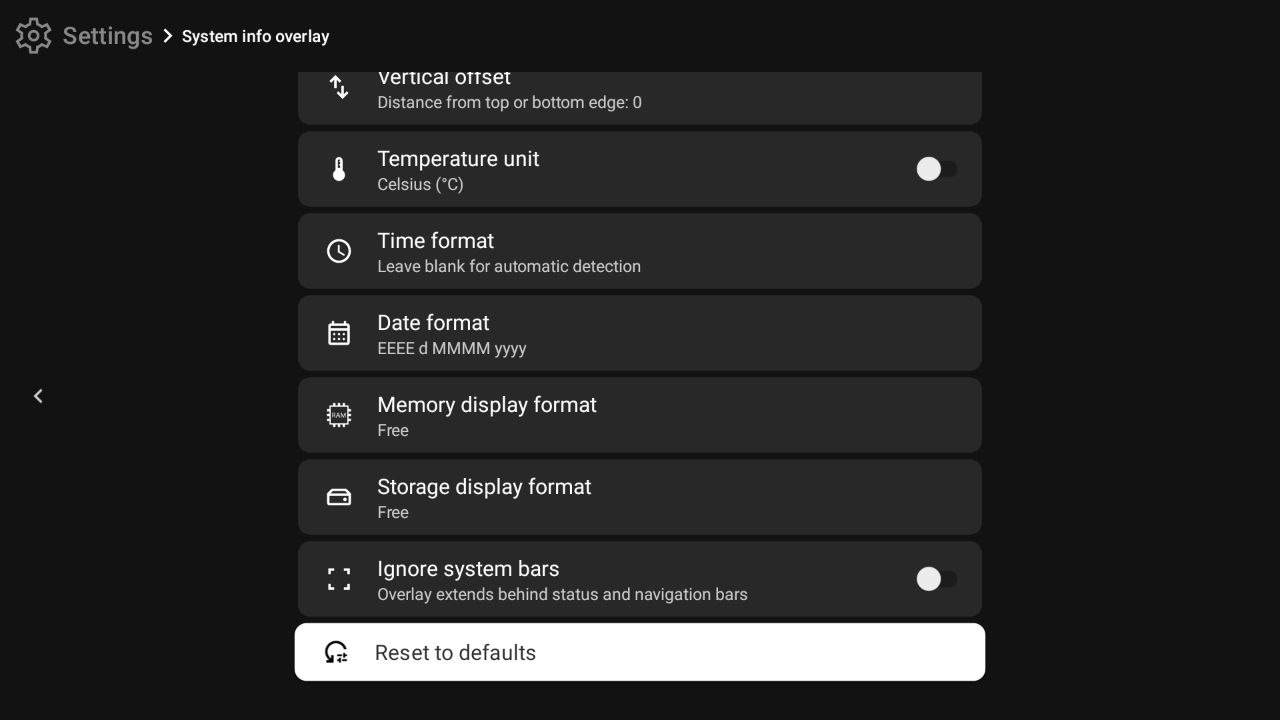
Memory display format
Controls how RAM usage is formatted: - Used / Total — e.g. 3.2GB / 8.0GB - Free / Total — e.g. 4.8GB / 8.0GB - Used only — e.g. 3.2GB - Free only — e.g. 4.8GB - Total only — e.g. 8.0GB
Storage display format
Same options as Memory display format, applied to internal and external storage stats.
Ignore system bars
When enabled, the overlay extends behind the system status bar and navigation bar, using all available screen space. Useful in full-screen or kiosk mode. Default: off.
Reset to defaults
Restores all overlay settings to their factory defaults.